Ceramic repairs
In my own work, I try to leave the marks made during the making as a tangible record of process. To disguise or fill cracks isn't really in keeping with my practice, but as a teacher working with students making ceramic sculpture, I've had a lot of experience in repairing broken and cracked ceramic pieces. You may find some of these methods useful in your work.
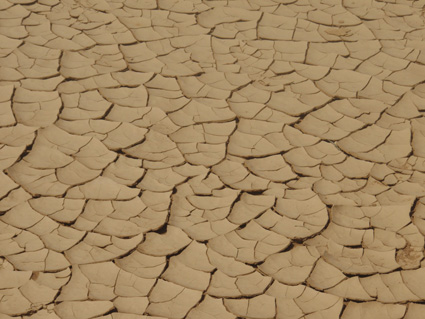
Cracks in unfired clay
Remember that clay shrinks as it dries.
SO DON"T ADD PLAIN WATER or SOFT CLAY to the crack!
Water will swell the clay and make you think you have fixed it. When it dries out and shrinks, the crack will be worse.
If your work has cracked, show your teacher, and discuss your options for fixing it.
Try to work out why the piece cracked.
Have you added softer clay to firm clay and the softer clay has dried and shrunk more? Was the join compressed enough? Is it very thick?
Here's a link to an article "Clay, Why It Acts the Way It Does by FH Norton that gives the clearest explanation I've seen to explain cracking and warping in clay.
Fixing a Crack in Dry Clay
Method 1 Rub in dry clay.
If a crack is in a dry piece , and is very small and there a no obvious stresses pulled the crack apart, then the simplest type of repair is to just rub some dry powdered clay into the crack before the bisque firing. It won't join the clay, but a fluid glaze after the bisque fire may fill it in so it doesn't show.
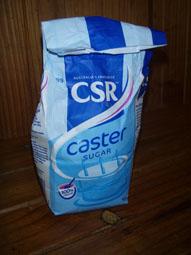
method 2 Sugar Clay
To fill a wide crack in a nearly dry to dry piece.Take a small amount of clay that has dried out until it crumbles. Add an equal volume of caster sugar, and mix together with your fingers. The sugar will soften and plasticise the clay. Scrape out the crack to solid clay. Wet the edges of the wet with a little vinegar. Work the sugar clay into the crack. The fine caster sugar adds plasticity, rather than water. The sugar clay mix will have much lower shrinkage than wet clay.
Method 3 Vinegar.
When you have managed to snap off a small part of your work and have a clean break, try vinegar. Paint a little vinegar on the join and work the break together. The idea is that the vinegar floculates the edges of the break, making the clay soften without absorbing much water.
Method 4 Paper Clay
For big cracks in a nearly dry to dry piece. Better than sugar clay if the piece still has some wetness and is going to remain unglazed. Put some some toilet paper in a jar, cover with hot water and blend with a stab blender until smooth. Pour off the excess water. Mix some bone dry clay into a paste in another jar with the stab blender. Mix 2/3 clay paste and 1/3 paper together. You may need to dry the mix out a little on plaster. Scrap out the crack, wet the edges with vinegar, and fill with the paper clay mix. A thick plastic mix is good for cracks, a thinner mix is good for joining.
Method 5 Patch-A-Tatch
Not my favourite method to reattach a broken piece of clay, but others swear by it. Wet the edges. Paint on Patch-A-Tatch and press together. I think it is a mix of ground fired clay and sodium silicate and probably some gum. It works as an airset glue and then a flux, to fuse the edges in the firing. Students often fail to push the edges together and the join will fail early in the firing when the gum burns out. Much better if the attached piece can have some support during firing, rather than relying just on the strength of the join. Fires off white, and can show through a transparent glaze.
Adhesives for Ceramics
Sometimes you have to attach a found object to fired ceramic. Sometimes things are dropped and broken. Sometimes they dry too fast and crack. Sometimes they were just too thick or badly made. Try to understand how and why something broke, so you can learn from this. Keep all the pieces and show your teacher. Sometimes it’s quicker and better to make another piece, but sometimes you may be able to make a good repair using hardware adhesives and fillers. But they aren’t easy to use well, and sometimes you can make a small imperfection into a much bigger and uglier problem. Obviously, once you have used an adhesive or filler, you can’t reglaze and refire the piece. So you may need to match the existing clay and glaze surface or cover with a paint. Ceramic conservators, who repair ceramics for museums, are often concerned with having repairs reversible, so the piece can be repaired again in the future as materials improve. This is not a concern here. Most of these hardware chain materials will be difficult or impossible to remove. The Nepean library has a copy of "Repairing Pottery and Porcelain" by Lesley Acton and Paul McAuley that describes more sophisticated materials and techniques, if you are interested in ceramics conservation. A porous unglazed or dry matt glazed piece is MUCH easier to repair. Of course, these surfaces shouldn’t be used for any functional ceramics that might be used with food. This guide is general. Whenever you use these fillers, adhesives and paints read and follow the instructions on the pack. Ask your teacher for advice on your piece before you begin a repair. Avoid skin contact and avoid breathing the vapor of these products. At Nepean we use all these adhesives, fillers and paints in a ventilated spray booth and handle with disposable gloves.
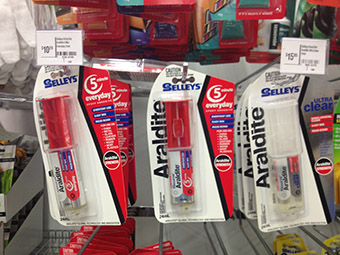
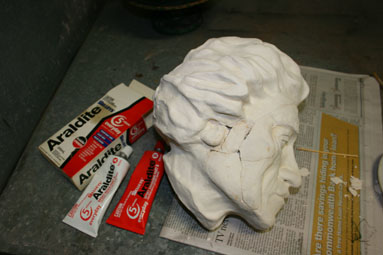
Epoxy like Araldite Crystal Clear or 5 Minute Araldite are very strong 2 part adhesive that will stick to vitreous and porous ceramics and just about any other found material (except a couple of types of plastics). It will fill small gaps and be very strong.
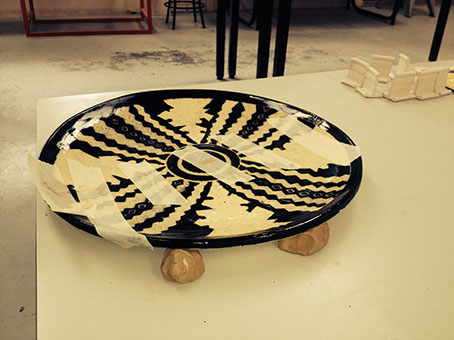
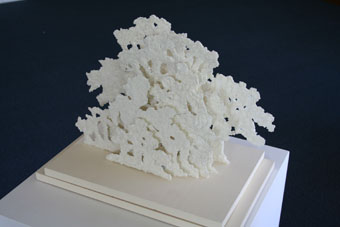
The Araldite Crystal Clear claims to dry and stay clear. 5 Minute Araldite will certainly go brown after a few years of exposure to light. You can also add dry powdered materials, like a little Titanium Dioxide or calcined clay, up about a third by volume, (available from the Glaze Lab) to make an opaque white epoxy. Don't add too much, or it won't stick. This can be useful for very small gaps in joining unglazed but fired porcelain, if you can match the colour well. Nathaniel Mickhaiel added a liitle zinc oxide to Araldite to make a good repair on this piece made from Southern Ice Porcelain fired to cone 10 in Oxidation.
These types of Araldite will set up in 5 minutes, so mix equal amounts for 2 1/2 minutes by your timer, and then place a small amount in the centre on the join. If you only mix for a few seconds and then apply, it will tend to seep out of the join. You don’t want the Araldite to show on the surface of the ceramic. Even if it doesn’t eventually turn brown, and even if you intend to paint over the piece, the different texture and porosity will most likely show.
I have read, but have never tested, that if you heat the piece up to 150oC the Araldite will soften and the join can be repositioned. When it cools it will regain strength. Easier to plan and get it right the first time.
Selleys recommend acetone or nail polish remover containing acetone to remove Araldite before it sets. I use disposable gloves and try to avoid any skin contact.
Superglue (cyanoacrylate) is made for that meet exactly, so it will glue something like porcelain with a neat break very well. It will also stick your skin to a glazed piece or to the tube very well, but it won’t stick the sort of slightly porous clay that we use at WSI Nepean for sculpture well at all. It won’t fill gaps and dries pretty much instantly, so a misaligned piece can't be repositioned. Acetone will remove it from your skin. I think the Emergency Department at Nepean Hospital probably has acetone, but let’s not find out.
Selleys All Clear is a co polymer sealant marketed for sealing things like windows and shower screens. I have used it for gluing porcelain together in installations. It dries with a flexible joint which can be useful for something very fragile, with gaps between the joins.
Liquid Nails Construction Adhesive like or tile adhesive can be useful for gluing tile to backing board for hanging. Some adhesives are not flexible. A large board of tiles moved to hang for exhibition will be likely to flex at least a little, and your tiles can pop off or crack if the adhesive doesn’t have some flexibility.
Museum Gel or Earthquake Gel is like a clear BluTac material, marketed for securing work to a shelf in earthquake zones. Handy for stopping a piece with a narrow base falling over if bumped, or to discourage someone picking up your work. The join is easily parted by twisting and you can peel it off by hand.
PVA, White wood glue, Bondcrete thinned with parts of water can be sprayed onto a sculpture with a powdery surface. At an 8:1 ratio (8 water to 1 part water by volume), you won’t see a shiny finish, but it will help seal and protect the surface. I also use on home made ceramic crayons so they won’t smudge off before firing. I also have used it to spray onto raw Majolica pieces to bind the powdery surface before or after painting.
You add a small amount of PVA to glazes and pigments as a quick binder/suspender if you are going to use the glaze immediately. It seems to curdle if you leave it for more than a few days.
Combining clay and other materials
Ceramics has great compressive strength, but poor tensile strength. Sometimes it is easier to make a sculpture in separate parts and attach them after firing, than to use small clay joins that might break trying to support heavy parts. Sometimes a small area of contact needs a metal spike like a bolt, nail or rod, to attach two parts of a sculpture together. It’s MUCH better to have the spike with you when you are working the clay and make the hole a little oversize, allowing for clay shrinkage, and then glue one or both ends in with Araldite after the final firing. If one ends slots in neatly without glue, the sculpture is easily dismantled and moved more easily. Drilling into fired clay is possible but needs a masonry bit, and is pretty likely to break your piece or chip around the hole.
For product information and MSDS on these adhesives and fillers. Check out http://www.selleys.com.au/and ALWAYS discuss your repair with your teacher before you start and ALWAYS read and FOLLOW the instructions.
Fillers
OK, so the parts of your broken sculpture are reattached, but there are gaps, chips or a crack still showing.
Ordinary tile grout can be used to fill gaps around tile or in sculptures. The grout can be coloured with stains or pigments to suit your work. Grout is water based, and is an easy and safe way to fill small gaps in broken work. It can be stained or painted over but obviously won’t be very strong, is better for small gaps and can’t be fired. Excess can usually be removed without too much trouble. If you need something stronger or need to fill a large area, you can try:
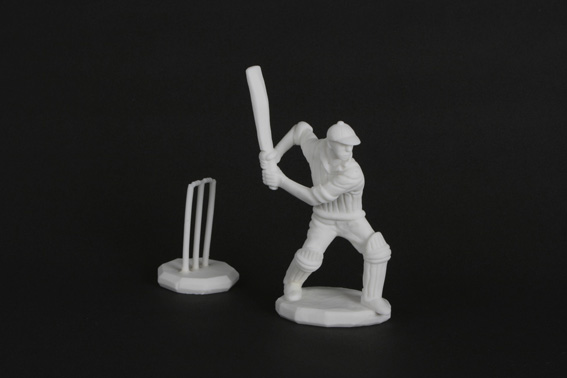
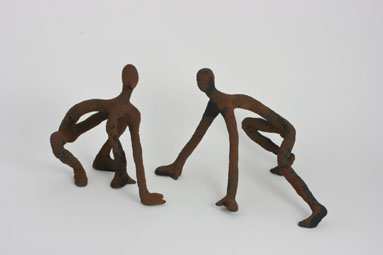
Knead It Multipurpose is a 2-part epoxy ribbon, that looks and works like permanent chewing gum. It will stick to ceramics and most found materials to fill a gap but does not glue pieces together. Example Nathaniel Mickhael soccer player
Knead the 2 parts together with your gloved fingers until even and you have just a couple of minutes to fill a gap. It sets hard to a grey color in 10 minutes. After 60 minutes you can drill or sand it. Working a piece of broken soft firebrick into the surface while it’s still setting can give a surface texture that better matches the sandy clay we use at Nepean. You can even model it to replace a lost or broken part of your sculpture. You can paint over it, but it’s too quick setting to mix in stain.
Car body fillers like Plasti-Bond are 2 part fillers. Get the part A filler and add the Part B hardener in a 50:1 ratio. You add pigment or crushed fired clay to the part A before the hardener to get a good colour and texture match to dry ceramic surfaces. Some brands set grey and others are pink without added colour.
Working time is 20 minutes, and it sets hard in an hour. You can texture it like Knead It . It will fill big gaps, but it is not a glue to stick broken pieces together. Glue with Araldite first, and then when that’s set, fill with Knead-It or Plasti-Bond. Plasti-Bond smells terrible, so at Nepean, we use it in the ventilated spray booth. Plasti_Bond and Knead-It are both very strong, and quick setting, which is an advantage if you only have one lesson to repair your work. It's pretty inexpensive and available at any any hardware shop and even most garages.
I prefer to use Apoxie Sculpt It is a bit more expensive two part putty, available locally from Artsup or by shopping online. It has a working time of about 3 hours, which is great if you need to work on something complex, or even sculpt a whole new addition to a piece, but it means that you might not be able to fill and paint your piece in a single lesson. The manufacturers, Aves recommend mixing the putty with a gloved hand, then say it is safe to work with bare hands. You can add a little paint to colour it, and wash your hands with soap and water after using it. There is no solvent to remove it once it sets. It doesn't smell too badly, and much easier to work with than Knead It or Plasti Bond.
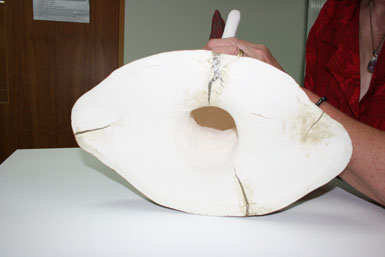
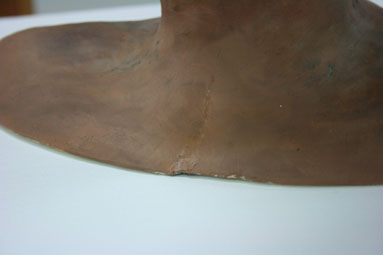
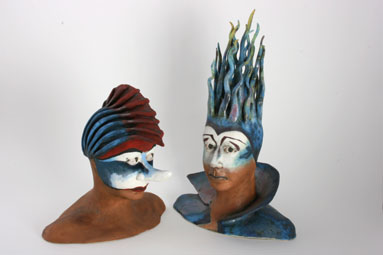
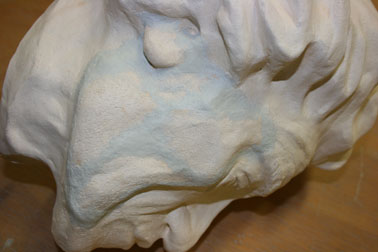
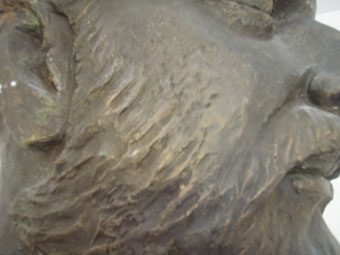
With this portrait by Helen Jenner, a section of the cheek blew out during the firing. The pieces were assembled and glued with 5 minute Araldite, then Apoxie Sculpt was used to fill in the gaps. When this has cured a painted finish will be used
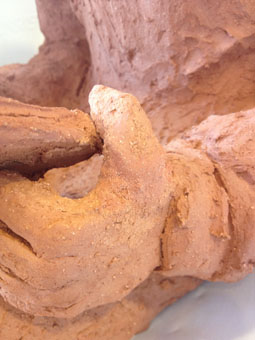
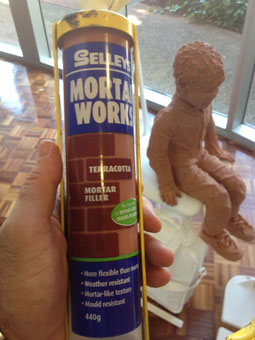
Selley's Mortar Mix Is a filler for matching to cement mortar. It comes in various colours. Robyn Lewis built child sized figures in a terracotta mix (1/2 Feeneys Red Raku and 1/2 Keanes terracotta) once fired to 1120oC. The thumb on one piece was accidentally broken off. The thumb was glued with 5 minute Araldite and Selley's Mortar Works terracotta colour with a little extra yellow and white acrylic paint for colour was used to fill the missing fragments. Robyn did a great job and the repair is pretty hard to spot.
PAINT and ROOM TEMPERATURE GLAZES
You’ve got your piece stuck together and you filled all the gaps. Your piece can’t be fired again because all the glue will burn out. If you haven’t matched the filler colour and texture to the rest of the piece or if it’s only bisque fired, you may have to consider what some ceramicists call ‘Room Temperature Glazes” and what sculptors call paint.
Artist’s acrylic paints, like Jo Sonjas or Chromacryl, will dry with a plastic sheen that I think looks terrible on ceramics. Avoid this type of acrylic at all times.
Gouache or opaque watercolour is better, in that it dries to a matt finish that better matches the dry glazes and underglaze colours used at WSI Nepean. It is water based and dries quickly.
Artist’s Oil paints are my preferred choice to match underglaze colours. Thin the paint down with turps and build the colour with layers. Don’t use gesso or primer.
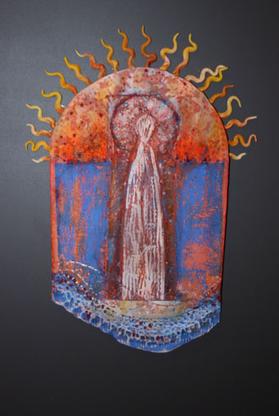
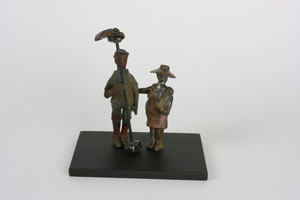
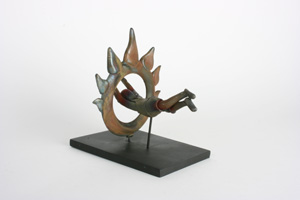
Rust ,Verdigris and Liquid Copper paints can give a great surface for sculpture. 2 coats of the metal-based paint and then another coat with an oxidizing patina. The first coats look black and the rust / verdigris /aged copper develops over 2 or 3 hours. These types of paints are available from Langridges, Porter’s Paints and Haynes. http://langridgecolours.com/ The Porters range are more expensive, but seem to give a stronger colour.
Porter’s Paints have a range of translucent lime paints and specialty paints that could look good on ceramics, on there own or used thinly over fired ceramic finishes to modify or tone down a ceramic surface.http://porterspaints.com/.
There are a whole bunch of fake finishes like Sandstone Paint and metallic paint available from craft stores and hardware shops that could look OK on the right piece or on a base made from customwood off cuts. With a lot of practice you can even do fairly convincing fake marble or bronze effects. Hammertone spray paint gives a convincing metal hammertone look.
Sculpture Patinas can be just clear shoe polish mixed with powdered paint or pigment to the colour you like, rubbed in, and buffed off with a cloth.
For Fake Bronze paint , you can paint all over with thin burnt umber oil paint, then highlight on textures with a little veridian green oil paint and/or bronze gold Rub and Buff.
Rub and Buff paint comes in small tubes in various shades of gold and pewter, and is greasy, like makeup, but dries hard. A little on your thumb rubbed on the high points of a sculpture can give a subtle highlight for impact. Great for when you’ve applied a glaze too thick to break over texture or underfired a little. Like makeup, a little can be great, too much is a very bad look.
Just like glazes, some of these finishes will suit your work and some won’t. Some may express your ideas in just the way you hoped and dreamed, and some may look terrible on your piece. Some require more skill and practice to apply well. Some are more toxic and require special care in their use. Read the instructions and MSDS, discuss your options with your teachers, have a look at any samples and TEST on a scrap tile before committing to your final work.
Like making work, assembling and repairing well is a skill that you can learn and develop with testing and practice.
Is it cheating? Ceramic materials have a unique quality and durability. You should learn to use them skillfully and creatively. But your sculptural intent can be realized using other materials too. Sometimes they can be the best option, or at least the best remaining option. You should include all the materials used in your catalogue description.